Showing posts with label gear. Show all posts

Friday, July 9, 2010

Shoes

What kind of shoes do you wear?  Classy?  Comfortable?  Worn out?  Crazy cute but highly uncomfortable?


If your car broke down and you had to hike 5 miles, could you do it in the shoes you have on?  What about the shoes you wear to work?  To church?  If not, it would be a good idea to carry a spare pair in your car or in your ginormous cute handbag.

How many pairs of shoes do you have?  I'm talking the practical ones here.  Cute uncomfortable ones don't count.  Do you have enough good sturdy shoes to last a couple of years if you couldn't buy another pair? 

What about your kids?  What about your kids next year?  You know those pioneer stories about the kids with no shoes.  I'm not that tough, plus it snows here and I'd rather not have to wrap my kids' feet in rags to protect them.  I don't know about you, but I'm not too handy at making shoes either.  I've made a couple pair of moccasins, but the mid weight leather soles sure don't last long if you're walking around on gravel or cement much.  Yes, experience speaking.  If you've got a good pair with buffalo hide bottoms they'll last longer, but they're also a lot more difficult to sew.

It's pretty easy to stock up on shoes and boots from the goodwill stores, yard sales, or online places like ebay in sizes you or your kids will need in the future.  Stash them in a box somewhere.  They don't have to be in perfect shape, although I would look for quality shoes that will last at least one season--more if you have more than one kid that might get to that size shoe.  Leather is generally  more durable than "all man made materials".  Style is not all too important as long as they are built well and your kid could hike around the woods in them.  If your kids are picky they may never wear them.  But if you need them, you'll all have shoes.

And no, the shoes in the picture are not from my closet.  I don't own a pair of shoes I couldn't walk a long way in--even my sandals and dress shoes.  How are your shoes?

Monday, January 11, 2010

The Mom Tool: Leatherman Squirt P4 Review

In my front pocket every day (well, except when I'm wearing a dress) is a handy dandy little tool.  It looks like this:


It's a Leatherman Squirt P4--a little "fits in your pocket or hooks to your keychain" style leatherman (only 2 1/4 inches long total) with the whole gamut of useful tools like pliers, wirecutters, file, knife, screwdrivers, awl. Heavy duty Leatherman-quality tool in a compact size.  I've had mine for about 3 years and put it through a lot of abuse and it's still in great shape (except for the finish that got banged up when I tried to use it as a hammer once--just go get a hammer if you need one, this tool isn't a very good hammer).


Serious mom usefulness for cutting the dumb little ties that hold price tags on, filing the rough spot off your kids' coat zipper so they'll zip their coat up all the way, cutting boxes open and slicing apples in the car, unscrewing battery compartments, and untying the bouquet of balloons that the kids just asked you to tie together (no, I didn't just cut all the balloons with the knife like I wanted to do, I actually used the pliers to untie them).

The blade could stand to be a little bigger (it's only 1 1/2 inches long), but then it would be a regular leatherman and you'd have to carry it in a sheath on your belt which belt I do not wear or in your purse which is already heavy enough and if you're like me it gets forgotten at the house far too often. This little baby goes in your POCKET so it rarely isn't with me. And it comes in Gray, blue, red, or pink. I could seriously be a leatherman salesgirl just for this tool. :)


They have a scissor version (the Squirt S4) and an electrical version (the Squirt E4) with wire strippers, but I wouldn't give up my pliers for scissors especially when the pliers have the wirecutters which cut most things I need to cut and I'd rarely use wire strippers either. So you see, it is an amazingly useful little tool every mom needs. And I suppose it would still be useful if you're not a mom, I just call it my mom tool because it so often is used in my mom duties. Yep, you need one. ;)

Thursday, January 7, 2010

Getting Preparedness Gear on the Cheap

You all know I'm cheap.  I do not like spending money and rarely buy anything new.  In the wake of the free canning jar episode, I thought I'd let you all in on some other methods of finding canning supplies without paying an arm and a leg, then I thought, heck, I've gotten gear outside of canning stuff using these sources also, so even though this post started with sources for canning supplies, it's grown to sources for preparedness gear in general.  And now, after following my thought process for a good three sentences, the moment you've all been waiting for . . . some of my favorite sources for preparedness gear on the cheap:

1. Yard Sales, Estate Sales, Moving Sales, Farm Auctions, etc.  The estate/moving/farm sales are especially productive as folks really want to unload volume and usually aren't that concerned at making a ton of money doing it.  Sometimes people don't know what they have and are willing to sell good gear for cheap.  I've picked up quite a few bargains at yard sales including a large water bath canner, volcano stove, reloading press and dies, snow boots, meat slicer, tools, and firearms.  Really, a great source.  I try to go without my kids since they are yard sale junkies also and always want to bring home a stuffed animal or book or lava lamp (yes, I've come home from yardsales with the kids with all three of those before).  Do not feel obligated to buy something just because someone's having a yard sale.  This can get you into spending too much on yard sale day.  Make sure it's something you need and will use.  It's okay to leave a yard sale without buying anything if there's nothing there you need.

1 1/2.  Thrift stores.  This is usually a good place to get canning jars in Utah anyway.  A little harder to find them during canning season, though.  Also I've found pretty good prices on candles and you can always have a few more of those in the storage.  Thrift stores go along the lines of yard sales--there's a lot of stuff there and you can end up spending more than you planned on stuff you don't really need if you don't stay focused.  Thrift stores usually collect from local people, so in better neighborhoods you will find better goods at the thrift store.  Our "local" thrift store is mostly recycled Kmart stuff, so I don't usually find much there for preparedness.  Also, the gear will be used so if it runs on electricity (like some kitchen gadgets) make sure to check it out in the store before you buy it.


2.  Freecycle or Craigslist or other local advertising method.  Put a "wanted" ad in these types of services and see what kind of response you get.  In our little area there is a half hour program every morning on the radio where you can call in to sell, barter, and trade items and that could be a resource as well if you're looking for something in particular.  Posting flyers at your post office or other community message board works as well.

3.  Work, church, other social contacts.  When they've asked for announcements at church, I've gotten up and said I needed pint canning jars or whatever and have usually gotten a response from somebody with too many jars or someone willing to trade something for jars.  The good part of this system is it is often free.  You could use this for learning something--"does anybody know how to knit? I'd really like to learn."  You can offer to trade services or other goods for whatever you're looking for, or you can offer to pay them as well.

4.  Word of mouth.  This kind of goes along with number 3, but includes just talking with whoever.  You know, "what have you been up to?" "Well, I've been canning a bunch of stuff from the garden this week."  Then if those people ever come across a stash of cherry trees that need picked or empty jars or whatever they don't have a need for, they know who cans that would appreciate any excess.

5.  Relatives.  I got my pressure canner and some jars from my Grandma when she quit canning in her old age and I've already got dibs on my mom's noodle maker ;)  Most people do get to the point in their lives where they won't be using that rifle as much or growing and canning a ginormous garden.  Let them know what you're up to and when they don't need their gear, you might get some of it. :)

6.  Ask for it.  We used to have a better paying job than we do now and bought ourselves some fantastic prep gear for our birthdays and Christmas.  Santa might bring you something you need or you could get it for your birthday or Mother's day or whatever.  If it's a big ticket item, maybe your family could all give you gift certificates to the store that sells the thing you want, or cash donations is good also.  I've seriously considered the collection deal for Christmas so I could afford the gift I really wanted, but didn't think of it until it was too late.  But it's a good idea anyway.


What has worked for you?

Saturday, April 4, 2009

Country Living Grain Mill Review and Sale

I am so excited to let you all know that I am now a dealer for Country Living Grain Mills! If you have not heard of this particular grain grinder, you are gonna hear all about them by the end of this post! What? You already know about them and have just been waiting for me to become a dealer for you to purchase one? (How sweet of you!) Well, you can click the button on my sidebar, or head right over here and get busy. The rest of you that need convincing, read on.We'll cover technical details first. Country Living Grain Mills are manufactured in Stanwood, Washington--yes, that's right here in the good ol' USA. Tough to find much made around here these days. These industrial quality mills are made of high quality, long lasting materials--no plastic--and are designed to last many lifetimes. The grinding plates are steel, so there's no bits of stone in your flour, but they grind flour from a variety of grains as fine as any stone wheel can and with 30% LESS effort than other hand grain mills. You can set the coarseness from fine flour to cracked grains (can't do that with an electric impact grinder). AND it will work when the electricity doesn't. Here's flour coming out of my mill last night (I wasn't the one cranking the handle--can you guess who was?)The body is hand cast solid aluminum. The large flywheel is designed to attach easily to a motor or exercise bike--the designer of the mill hooks his mill to his exercise bike and calls it his "well-being machine." (I would love to do that with mine . . . I just need an exercise bike and my little room in the shop finished.) The shaft runs on sealed bearings for easy turning, and with a steady crank, the mill can put out more than 7 cups of flour in 19 minutes. And did I mention how easy to crank this mill is?
AND, the hopper holds 2 lbs of wheat so you won't be getting off your exercise bike and refilling the grain every half block!

I'm sure I left something out--check out Country Living's site if I didn't discuss something you want to know--they probably have the answer there!

And Click here for testimonials on the Country Living Grain Mill. Ready to purchase one yet?
Now, here's my story. I own this grain mill and have had mine for 7 or so years and it works as well now as the day I bought it. It is fantastic. I will admit that I have not used it as much as I could have. I have primarily ground beans and wheat in it. It has never been hard to grind, but it is more workout than pushing a button on an electric mill for sure!

In planning our food storage, we plan for the worst case scenario, which for us includes no electricity. So when we went looking for a grain mill, we did not want an electric grinder that wouldn't work when we needed it to. We did A LOT of research into different hand grinders, and found that many of the lower priced mills were unreliable (some didn't work right out of the box) or didn't last very long under regular use--again, not what we wanted to have around when our lives depended on it. After much research and deliberation, we decided on the Country Living Mill. We purchased the nut/bean auger and the power bar with it (I'll cover all the options in a little bit), and have never regretted the purchase.

This is NOT a cheap grain mill--they retail for between $395 and $409, but the comfort of knowing you have a quality mill that will last and serve your family when it will matter most is worth that to me.

Last night, we ground some wheat and made cookies with it. In the videos, I have the power bar on my mill (which makes turning even easier) and do not have it set on the finest setting (but pretty close). We ran the wheat/flour through twice to get the fineness I wanted and make it easy enough for my 4 and 7 year old to turn without any trouble. I DID NOT GRIND ANY OF THE FLOUR LAST NIGHT. Hey, if my 4 year old can do it, I bet you could crank this mill. (Oh yeah, they did their own hair.)


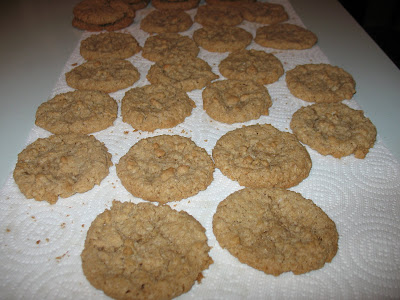
And here's our amazing cookies: Dad's favorite oatmeal cookies--yummy!

Ready to buy one yet? Head on over!

Did I mention I can take Visa and Mastercard securely when you purchase through my link?

And your mill will ship to your door absolutely free!

Here is a fine comparison to a few of the other hand crank grain mills on the market done by Walton Feed.

Now, a bit about the accessories that are available for the mill in no particular order and with descriptions copied from Country Living's website (my comments in parentheses).

1. The Power Bar. Reduce the effort of grinding grain by 40%! This steel extension attaches quickly and easily to the flywheel of your Country Living Grain Mill, creating more torque and making for an easier grind. (This is what makes it so easy for your kids to help!)2. Wall Mount Kit. (If you're real crafty, you can probably just make this yourself.) If you don't have any available counter space the Country Living Wall Mount Kit offers an easy and effective solution to your dilemma. Comes with pre-drilled holes and equipped with the necessary hardware to mount your mill and shelf to the wall. It is designed to be mounted to a single stud, or into two studs spaced at standard 16" centers. natural wood.3. Corn and Bean Auger. Now your Country Living Grain Mill can be even more versatile! Use the large auger to mill corn, beans, and coffee. To use, simply replace the standard spring auger with this larger auger. The large auger is cast from stainless steel. (You'll want this if you're planning on grinding cornmeal or bean flour.)4. Grinding Plates. With normal, one-family use, your plates should last 3-4 years. Is it time for you to order a replacement set? Your Country Living Grain Mill will be an essential, life-sustaining product during times of emergency. Having a spare set of grinding plates on hand will give you peace of mind. Be prepared and order a set today!5. High Impact Polymer Bin with Lid. This beautiful, clear bin with etched wheat pattern is designed to fit snugly underneath your Country Living Grain Mill hopper. After grinding, simply place the protective lid on the Country Living Bin for perfect storage of your freshly ground flour. This attractive bin has an 8-cup capacity! (I use a bread pan to catch my flour, but it doesn't hold as much as this bin does.)6. Motorization Kit. While there is still power, motorize! The motorization kit includes 1" wooden baseboard, motor with pulley, belt and belt guard, and miscellaneous hardware (washers, screws, Allen wrench).7. Country Living Case. This handsome hand-stained hardwood case is perfect for storing your Country Living Mill accessories. It will hold an extra set of Grinding Plates, the Corn & Bean Auger, the Power Bar Extension Handle, and the Just-in-Case Repair Kit. This case comes empty, and does not include any accessory parts.

or Complete Country Living Case (with all the stuff). Get the Country Living Grinding Plates, Corn & Bean Auger, the Just-in-Case Repair Kit, and Power Bar Extension Handle together in a handsome, hand-stained hardwood case at no additional charge.8. Just In Case Repair Kit. Includes 2 replacement bearings, proper size bolt, nut, 2 custom-cut washers to match bearings while pressing, 12 standard washers, stainless steel spring auger, snap ring, 2 long keys, and 2 short keys. (and instructions).9. Hopper Lid. Keep the hopper of your Country Living grain mill clear of dust and hungry rodents with this handsome lid constructed from natural wood. Designed to fit snugly inside the lip of the hopper. (Again, if you're crafty, you could probably make yourself one of these.)

There you have it. See why I'm so excited about being a dealer for these fantastic grain mills? Now, head over and get something to grind with!

Monday, February 2, 2009

Outdoor Gear and a Giveaway

GIVEAWAY CLOSED. Read on anyway . . . :)
Well, the silly groundhog said this morning there would be 6 more weeks of winter. We're actually in a little warm spell here, but I know other places in the country and around the world are still in the deep of winter, so today I'm sharing some thoughts on winter gear and having my first ever giveaway!

I'm super frugal, but one area I've found that it doesn't pay to cut corners on is outdoor gear--especially for the kids. Sure, I can get snowpants at Walmart for cheap, but they are leaking through, getting my kids wet, and torn before the end of one winter! Same with cheap boots and mittens/gloves. I will absolutely spend a little extra and get quality outdoor gear for my kids. I want my kids to enjoy being outdoors, even in the winter, and you all know that when the kids get wet and cold, the snow fun is over, and they'll likely end up with pneumonia or something (=a trip to the doctor=$$$) from the whole experience.

SO, we've been weeding out the cheapo snow gear and getting high end gear for our kids for the last few years. It's actually ended up costing LESS because I can get a used pair of Columbia or similar brand snow pants on ebay (or a thrift store/yard sale if you have good ones around you) for half the cost of new and only a little more than the walmart pants, but they last 3 years or more--as long as they fit (my kids don't grow very fast) AND are still good to pass down to the next kid. I've had the same experience with quality snow boots (Kamik, Sorel, Columbia). They hold up, keep the kids feet warm and dry, and can be found used for only slightly more than a new pair of cheapo boots that leak and don't last through the winter.

And now to plug one of my favorite winter products--L-Bow Mittens. If you have not used these mittens, you have to give them a try! My girls are wearing theirs in the photo at the top. Developed my a Minnesota mom, these mittens are waterproof (really!) and built with an attached gaiter that fits over the coat sleeves (or under like my littlest likes to wear hers). How many times do you have to tuck your kid's mittens back in their coat sleeves because the snow is getting in their wrists? And at the end of the snowman, they're crying for hot cocoa because their fingers are wet and freezing! Well, no more of that with these fantastic mittens.They are lined with Thinsulate insulation and the line I have are BREATHABLE as well as WATERPROOF. This means the kids' sweat can get out but the water can't get in! Amazing--warm, dry hands for all your snow activities!

Another great thing about these mittens is the universal thumb (not on gloves). The thumb is a large pocket and right in the middle, so either hand can use either mitten. I thought this would make them hard to use, but my kids have had no problem building snowmen, snowforts, snowballs, snowangels, etc. in them. AND it makes them easy to get on because you about can't miss the thumb hole!For the bigger kids, L-Bow Mittens also makes L-Bow Gloves. Hooray--fingers!

Now, after all that, here's the giveaway. I'm giving one lucky winner a pair of L-Bow Mittens or Gloves! Yep, warmth and snow fun for your little one from me! The winner can choose boy (black/blue as pictured) or girl (red/navy as pictured) plus specify the size: Small (2-4), Medium (girls 4-6, boys 4-7), or Large (girls 7-14, boys 8-12). The small size is mittens, medium or large are gloves. If you don't want to wait to win, you can visit my eBay store here or by visiting the link on my sidebar and buy some now--I even have them on sale this week!

Here's how to enter: Leave me a comment on this post telling me what you like to do outside in the winter. Easy, right? Please make sure I have a way to contact you in case you win!

If you want to follow my blog, subscribe by email (both on the sidebar), post on your blog about this giveaway, whatever else, you can get an extra entry for each one, just leave a separate comment for each thing you do. You can also get an extra entry if you join the NRA through my link or are already a member!

The giveaway is open to anyone US, international, military, etc. and will end Sunday Feb. 8th at 11:59 pm. I'll choose a winner using Random.org next Monday morning. International winners will be responsible for any duties/taxes/fees related to receiving the package. Happy 6 more weeks of winter! :)

Wednesday, January 21, 2009

Firearms Post

I was not going to delve into firearms for a while on this board, but was asked to guest post about it at Total Survivalist Libertarian Rantfest. Be forewarned, if you go to the post there, it is not a G rated blog--probably more of a PG13, but they have interesting discussions and one recently was about the basic 4 firearms a person could get by with: .22 rifle or handgun, shotgun, centerfire handgun, and centerfire rifle. I know you all don't know what some of those are and some of you do, and that's okay, I'll go over it in a future post for those who don't. In fact, if you don't know much about firearms and don't care to dive in without the basics, you can quit reading now :) If you want to read the post with their commentary, it's here. Otherwise, here's just the part I wrote:

I am a small framed woman (5’2” approx 110 lbs) who loves to shoot stuff. I’ll give you a disclaimer here: I have not shot every gun out there, not even close. I’m basing my choices on guns I own or have handled or fired, so there might be something better out there that I just don’t know about.

There are a few problems with 80% of the guns available if you are smaller than the average man (which most women are) and especially if you’re smaller than the average woman. First is the weight of the gun. This has to be somewhat of a compromise. A long gun that is too heavy leads to an awkward shooting stance just to get it stabilized. A handgun that is too heavy will also be difficult to hold right. But if it’s not heavy enough, you personally take a good deal more of the recoil since the weight of the gun isn’t counteracting the pressure of the round being fired. This is especially true with handguns. The little KelTec P3AT or Ruger LCP are cute and concealable, but have a nasty bite when they are fired due to their relative light weight, so you’ll probably be cutting practice sessions short.

Another problem small people have with most long guns is that a "standard" length of pull (usually around 14-14 1/2 inches) is too long. They might believe they have an issue with the recoil when actually they have an issue with the gun fitting right. If your gun fits right, you can take more recoil because it hits in the correct place on your shoulder instead of out on your arm somewhere. This would apply to rifles and shotguns. I've only shot one Ruger 10/22 and didn't like it due to weight and length of pull.I have similar experience with handguns. .45's are not so bad if I can get my hands securely around the grip. I've had a lot of people recommend Glocks/M&P's/XD's/etc., and they are fantastic guns, but I cannot physically get my hand around the grips of the double stacked magazine pistols (even the new ones with adjustable grips). If my hubby brought one of those home for me, he'd just have to keep it (which I’m sure he wouldn’t mind). Being able to get a good, comfortable grip on your handgun goes a long way towards making shooting fun and if it's fun you'll want to do it more and practice makes good shooting.

So after all that rambling, here’s the guns I like:

Centerfire Rifle: For average shooting, I like our Winchester Model 94 lever action 30-30. The stock length is only slightly too long which is manageable. It is a little shorter overall, a lot lighter weight, and has less recoil than our other deer hunting rifle (Remington 742 30.06 autoloader). If I’m actually going to hunt deer, there’s a lot of open country around here and so I use the 30.06 with the scope attached. Even though I don’t like it as much, it’s better for longer distance shots. (I actually do most of my hunting archery, so haven’t had to use the rifle much.)

Centerfire Pistol: I am not a fan of revolvers. Some people are and they are welcome to shoot them. I own and love a Colt Mustang .380. Unfortunately these pistols are no longer in production although you can find them used every once in a while. I’ll tell you why I love this gun and then maybe my reasoning can apply to a more readily available handgun. Remember what I said about fit in the introduction? This gun fits my hands perfectly. For a .380 it is a bit heavy, but that actually helps with the recoil bite—I get very little recoil with this pistol. Another consideration with any gun and especially one that you would rely on to protect your life or the lives of your loved ones is reliability. The gun has to go bang every time, and this one does. Another reason I like it is it is not too “fat”. Thick guns are hard to conceal (if you are inclined to carry concealed), especially on a small framed individual, and I can carry this one in my favorite holster and only I know it’s there (okay, maybe my husband can tell). I have picked up the Kahr pistols and really like the feel of them—maybe someday I’ll move up to a Kahr .40 if I ever have that much cash laying around! :)

.22: Marlin Model 60. This is no status symbol gun, but it is fun to shoot, accurate, and lighter weight with a shorter stock than the Ruger 10/22. And did I mention it’s cheap? What more could you want for a plinker rifle?

Shotgun: Remington 870. I do not own this one, it’s on my wish list, but I’ve done a lot of shooting with my friend’s. His is a 12 ga right out of the box so I always go home with bruises on my arm from not being able to get it shouldered properly. These shotguns are readily available, dang fun shooters, and cheap in the realm of shotguns. The 20 gauge youth model is a fantastic fit for smaller people. I really want a 12 gauge so my husband can shoot it also, and I can shoot 12 ga. target loads all day long with the right stock fit, so am looking at aftermarket adjustable stocks for the 870 12 ga. Remington told me their 16 ga. youth stock will interchange with their 12 ga 870, so there are options to get a youth size 12 ga. shotgun, I’ll just have to work a little harder for it.

So ladies, if you’ve never liked shooting, but you’ve always just shot the guns your husband/dad/boyfriend used, look for something that fits right and give it another try—you might be pleasantly surprised. Handle as many guns as you can get your hands on, and fire as many as you can before making your decision (most friends with guns would be more than happy to let you try their guns out, and there are ranges that will rent you different guns also—check around). And whatever you decide on, I’d also recommend some training. Some ranges have a ladies’ night if you don’t want to go shoot with a bunch of guys. Husbands/boyfriends/dads, if you’re looking to buy your girl a new gun, make sure to take her with you to handle them—you’ll both be happier with the purchase that way. A comfortable gun makes all the difference between loving shooting and hating it.

Tuesday, January 20, 2009

72 Hour Emergency Kit Updates

I got together with a couple of friends last week and we hashed over our emergency kits. So now I've added a couple of things: mini scriptures, sunblock, purell (hand sanitizer), and some cash. I put all my liquid/lotions/soaps in snack size baggies to protect against leakage.

I also updated my medications. Before, I had 20 year old meds all thrown together in one little bottle, but realized this is not a good or safe method of keeping medications, so I put new medications each in their own snack size ziplock and wrote what medication it was, the lot number and date of expiration on the bags. I was surprised to find that half the meds in my cupboard are expired! Guess I'll need to be getting some fresh stuff . . . Don't forget your sharpie! :)Another thing I will be adding was mentioned in the comments section of my emergency notebooks post. I picked up a couple of flash drives at WalMart for $5.00 each and am scanning important documents and putting them on the drives, then putting the drives in my kits (see the emergency notebook post for a list of suggested documents).

One of my friends suggested shrinking the house down and getting one of those carpet bags like Mary Poppins has . . . anyone know where we could get a carpet bag like that? Maybe we could get a group deal on them . . . :)

Monday, January 19, 2009

Used vs. New Canning Lids

Here's a quick post to answer a question my sister had: How can you tell the difference between used and new canning lids? There are a few ways to tell. First, the new ones are in a box and second, the used ones have the date sharpied on them :) However, if you used lids on freezer jam, they aren't in the box and have a date sharpied on them, but they are still not USED. And sometimes new lids get mixed in with old lids in the sack/box/wherever you keep your canning goods. And sometimes you might not have marked the lids. So here's a better method. Turn them over and look at the gummy stuff around the rim. If it's smooth like this one, it has not been sealed and is good to use to seal a jar.
If it has a deep jar rim indentation in the gummy stuff, like this one, it has already been sealed and cannot be used again.Sometimes if the lid has been on a jar like for freezer jam, or if you store your empty jar with a lid on it and the gummy side has been against the jar rim, it will have a slight indentation in the gummy stuff, but it's still good to use. It will not be as deep an indentation as a lid that has sealed. Hope that helps!

Monday, January 12, 2009

Emergency Notebooks

I'm putting together a couple of notebooks (might turn into more). The first is a Grab and Go Emergency notebook with copies of important documents in it. I'm thinking to make a second copy and leave it at my mom's house or something so if my house burns to the ground while I'm away, I still have access to my information. Here's a long ol' list I got from a preparedness fair of what to put in it (most of these I don't even have, so they aren't going in mine, but I guess as you get older you get more of this stuff):

Proof of Identification
*Driver's License
*Concealed weapons permit/s
*Birth Certificates
*Social Security Cards
*Passports
*Marriage License

Property Records
*Mortgage/Deed
*Rental agreement
*Video, photos, lists of inventory (my insurance guy said to make sure I am in the photos or video--better proof that it was actually my stuff I guess)
*Receipts for major purchases
*Payment record for major repairs
*Appraisals of jewelry, other valuables
*Titles to vehicles
*Cemetery lot information
*Firearm inventory/Serial Numbers

Insurance Policies
*Homeowners
*Health
*Life
*Disability
*Automobile

Medical Information
*Immunizations, other records
*Prescription information (drug, dosage)
*Health Insurance ID Cards
*Physicians names and phone numbers
*Living will
*History of illnesses, accidents, surgeries
*Power of Attorney for health care
*Dental records

Estate Planning
*Wills, trusts
*Power of attorney
*Funeral instructions
*Attorney's name and phone number

Financial Records
*Tax returns (2 years)
*Credit cards front and back
*Stocks, bonds, CD's, money market
*Recent bank statement

Other
*Personal address book
*Backup of important computer files
*Usernames and passwords for online accounts
*Key to safety deposit box
*Recent photograph
*List of where original documents are kept
*Extra set of car and house keys
*Map of area and phone numbers of places you could go in case of evacuation
*Numbers of gas and electric company
*Emergency numbers

Whew. Obviously it will take a while to get all this together and copied and I still have to buy the notebook, but I've started with some of the personal identification documents. You want to get the information for every member of the family, so I'll also have to catch my husband home so I can copy the contents of his wallet. I was thinking if the documents are put in page protectors it would probably be best to keep them whole and so they don't accidentally tear out of the notebook, otherwise, 3 hole punch them.

Then put the notebook somewhere not hidden too deep, but camoflauged enough so you know what it is and can get it quickly if needed, but it doesn't scream to theives to steal it (it has your WHOLE LIFE in it!)

My second (and maybe third) notebook is for any prep information I have that I want to keep. Remember if the power is out you won't be able to look it up on the internet! So print it off and put it in a notebook. Right now I have a file folder packed with stuff that is going to go into this notebook so I can actually use it instead of being stuffed in a file where I'll never look at it if I even remember it's there. Instructions, recipes, information. Anything you think will be useful. Copy, print, write stuff down and put it all in one place.

HEY, don't stop reading! There were some good questions brought up in the comments! Click on comments and read on! :)

Thursday, January 8, 2009

Yard Sale/Thrift Store Shopping List

I usually have a list in the back of my mind when I go to a yard sale or thrift store of things I'm looking for. I guess it would be better to have it written down and keep it in my wallet or purse so if I get a chance to stop by somewhere I'll know what to look for. Always check the item's condition. A $3.00 backpacking stove is useless if it doesn't work. Any preparedness item is fair game and you never know what you'll find at a yardsale that might not be on your list, so keep an open mind, but here's a few things to watch for if you don't already have them:

Kids clothes/shoes/snow gear/coats/etc. in good condition. Even if they're 2 sizes too big, KIDS GROW! I have a box or 2 for each of my kids to "grow into" and every spring/fall we bring it out and shuffle clothes around.

Camping/Outdoor Gear--propane/gas stoves, tent, fishing poles, etc. I got a volcano stove and accessories at a yardsale once for $40, the one we bought new was $129 without any extras!--now it sits in my storage waiting to be used (guess maybe I should get it out and practice with it).

Firearms/Shooting stuff (this is my dream yardsale!). Unusual to find guns for sale, but every once in a while someone is wanting to sell one. We had a yard sale once and someone asked if we had any guns, (of course we weren't telling or selling) so I guess it doesn't hurt to ask even if you don't see any. I have seen a trap thrower, reloading press/dies/scale, boxes of shotgun shells, you just have to keep your eyes open.

Cast iron or other heavy pots/pans, dutch ovens--great for outdoor cooking.

Old candles--light is always good, but even if you can't use them for a candle, you can always melt them down for egg carton/lint firestarters or tuna can stoves. (we'll discuss these another time)

Canning and Food Preservation--canners, jars, canning tools, dehydrator, meat grinder, etc. I've seen all this and bought a lot of my own canning/food gear at yard sales.

Tools. Even crazy old timey tools--we just got a forge from a farm auction in Denver (My husband knows what to do with it--I think I'd just have to put a board over the top of it and make it into a table.)

NON ELECTRICAL entertainment. Board games, etc. If the power's out, you'll need something to do!

Fabric. This is because I love to sew, but it wouldn't hurt anyone to have a few yards of good heavy fabric around to repair pants, tents, whatever with, and fabric at yardsales is amazingly cheap! I sew reenactment clothes and made me a skirt once from a chunk of fabric I got for 35 cents! I love it! (Reenactment clothes already made cost WAY more than 35 cents!)

This is not a comprehensive list. Keep in mind any gear you might be looking for at the time you hit the sale. At one point we were looking for an old wood stove. Now we found one and we're looking for triple wall pipe to go with it so we can install it.

Not sure why I'm dreaming about yard sales in the dead of winter . . .

What's on your list?

Saturday, January 3, 2009

HEAT!

When preparing for emergencies, some of the first considerations are clean water, food, shelter, and in cold climates like ours--heat. My main concern in this house has been heat. We have gas heat so if the gas flow is interrupted OR the electricity goes out, we have no heat and the place cools off in a hurry! We have an old wood stove outside waiting for us to get some triple wall pipe so we can install it somewhere in this tiny old house, so it's not doing much good right now. So for Christmas this year, Santa brought us a kerosene heater (he got it used on ebay for about $70 including shipping).
I'm pretty excited, but to be honest, I don't have the slightest idea how it works! I'll be picking up some kerosene next time I'm in town and it has an instruction book with it, so I should be able to figure it out . . . :) Feeling better about not freezing anyway.

Monday, December 29, 2008

Emergency or Camping Shower

Here's a great way to clean up in the woods--the Camp Shower. If you're like me, a couple of days without a shower starts affecting my mood and there's only so many ways to wash up in the woods most of which are a pain in the neck and use lots of water. One year while camping, there was a guy camped near us that had one of these and my crafty mother looked it over and made one for herself, then this year made one for each of her kids for Christmas. I know, you want my mom, but you can't have her! She's mine!
Anyway, here it is:It is made from a 2 gallon weed sprayer (only use a fresh one--you don't need old weed killer residue in your shower) and a kitchen sink spray nozzle. I'm not sure what hardware you need to hook the hoses together, but I took a picture of it and maybe you can figure it out. OR just ask at your local hardware store and they should be able to fix you up with something that will connect the two hoses together.My mom also has access to an industrial sewing shop and put together a nice little carry bag with shoulder strap and a mesh toiletries pack and washrag hook attached. LOVE IT! To use the shower, heat up some water and fill up the sprayer. Pump the top to put pressure in it and use the sprayer to spray the water. When the pressure gets low, pump it up again.

The guy who we copied this from had a one gallon sprayer and he put it in a black bag in the sun and it would heat itself up. Two gallons has proven to be too much for the sun to heat, but one gallon is not enough for us girls to get clean with, so we've got a two gallon sprayer and have to heat water without relying on solar power to do it.

Sunday, November 30, 2008

Storing Jars

When I've eaten the fantastic food (well, most of the time it's fantastic) out of my canning jars and washed them out, it's time to store them until I need to can something else. I like to wash the used lid and ring along with the jar and then put the clean lid UPSIDE DOWN on the top of the clean jar and screw it on tight with the ring. The reason I don't put the lid on right side up is that the gummy stuff sometimes sticks to the rim of the jar and then when I'm ready to use that jar I have to scrape crusty gummy ick off the rim before I can use it. Upside down, I don't get any of that. I'll let you just look at the pictures to see why you want to store your jars with lids on. On the left, a jar just stored in a box, on the right a jar stored in a box with the lid on it. The lid keeps the jar nice and clean. Of course you'll still want to wash it before canning something new in it, but wouldn't you rather start with a mostly clean jar than one that's all dirty? Sometimes it's even better than just dirty ick--you'll get dead spiders/bugs in them as well--super gross! So it's worth it to save the used lid and keep it on the jar until you're ready to use it again.

Saturday, November 15, 2008

Canning Tools

If you're going to can your own food, you'll need some tools. Don't worry, the list isn't long and I'll put in pictures also so you know what you're looking for.

First a canner.

High acid foods like fruits, jams/jellies and tomatoes can be bottled in a Water Bath Canner or Boiling Water Canner (both the same thing). It's basically a big pot with a lid and a rack to raise and lower the jars.
Low acid foods like vegetables and meats require a pressure canner. This canner has a lid that seals and has a pressure regulator on the top. It is nothing to be afraid of! Don't leave it unattended, follow the directions, and you'll be fine.
A canning funnel is a must for making things easier and less messy. Seen here in action, it is a wide funnel that fits inside the jar opening. Perfect for loading your produce into jars. An absolute necessity for jams and syrups.
The jar lifter is also a requirement. Use it to pull hot jars out of the canner.
There are other tools like a magnetic lid lifter for pulling lids out of hot water to put on your jars, and a plastic bubble freer spatula thingy to get air bubbles out of jars before canning, but I've managed to get by quite comfortably just using a fork to lift my lids and a knife to free my bubbles, so if you want those other tools, go ahead and get them, they are probably nice, just not necessary.
Last is a cooling rack. The jars cool off best when air can get under them. If you don't have a real cooling rack that is large enough, you can make one (or two) with your oven racks. Take out an oven rack and turn it over. Then find something to prop up the opposite side that holds the rack about level. My mom used kids' wooden blocks to hold hers up. My rack fits just right with a plate inverted holding up the other side. Easy and one less piece of equipment to keep around!

Oh yeah, don't forget jars, lids and rings of your choice. I've gotten my jars at yard sales, thrift stores, and from people who don't can anymore, so I have a variety of sizes and some of each wide and narrow mouth. If I were to purchase all my jars, I'd decide on either wide (more expensive, but easier to load) or narrow (less expensive) and get all of one kind so then I'd only have to buy one kind of lid and rings. Just easier that way.
You may be able to find some or all of this stuff cheap at yard sales or estate sales. Thrift stores can also be a good source (outside of Utah).
There you have it. If I think of anything else, I'll add it, but that's about it for canning tools.

Thursday, November 13, 2008

Dehydrator


A dehydrator is a fantastic tool for food preservation. I have used mine to dry green beans, corn, zucchini, tomatoes, apples, apricots, strawberries, herbs, actually anything that gets in my way when the dehydrator is out has the chance of being tossed in the dehydrator and dried.

I have only owned one dehydrator--it is an Excalibur and I love it. Here's the pros and cons:

Pros:
It's really big--I can dry lots of stuff at one time.
Adjustable Temperature.
Timer (this way I can dry stuff while I'm sleeping and it doesn't get too dry).
I can dry large items by leaving some trays out to make more space for what I'm drying.
The heater/fan is in the back instead of on the bottom--the bottom is smooth so it is really easy to clean up.
The trays can go in the dishwasher (top rack only I think).

Cons:
It's really big--so if I'm only drying a small amount of stuff, the dehydrator is the same size as if I'm drying lots of stuff.
The internal temperature is not as even as it is advertised, so I do rotate trays from the top and bottom toward the middle about half way through the drying process, although you'd have to do this with a stacking type dehydrator also. The rotating process is really simple--I just pull out the two trays I want to swap and stick them back in opposite locations.

Umm . . . . I guess that's all for cons that I can think of. Overall it's a fantastic product.

Looks like the model I have with 9 trays and a timer goes for $249-299 right now depending on where you get it--YIPES! But I've had and used mine for about 9 years and it's just as good as when I first got it--I don't expect I'll ever need another dehydrator. Here's Excalibur's site for more information: http://www.excaliburdehydrator.com/

Wednesday, November 12, 2008

Apple Peeler/Corer/Slicer

Here's the apple peeler/corer/slicer I use. It is a Back to Basics brand and clamps to the countertop. I've been told you can get a version of this through Pampered Chef as well. When the handle part is pulled back you stick an apple on the prongs with the prongs going into the core from the bottom or the top of the apple with the opposite end aimed toward the coring circle. Then just start turning the handle (kids love this job) and it peels, slices and cores the apple as it goes through the blades. Slick! Makes apples for pies, apple crisp, dehydrating, etc. fast and easy.
Here's the corer/slicer/peeler tool in action. My kids love to eat the peelings also!

Tuesday, November 11, 2008

72 Hour Survival Kits

Let me start by saying that the 72 hour kit is highly overrated. The idea is a kit with all the items you need to survive for the first 72 hours after a disaster in a portable container of some type in case of evacuations, etc. Here's the main problem with this idea: Who is coming in 72 hours to save you? How do you know they will get to you before your supplies run out? If you watched coverage of the Christmastime Indonesian tsunami or Hurricane Katrina, you saw first hand that it can take over a week for the government or other relief agencies to get to the hardest hit areas. Could you live that long on what's in your 72 hour kit? So I like to call my kit an Emergency Kit and have not limited it to 72 hours worth of stuff. I have kits for me, my husband, and each of our kids (the youngest's stuff is packed in my kit for now, but it's about time to get her her own pack).

Commercial kits are usually a good starting point. DO NOT buy a kit off the shelf and put it away and expect it to be any use to you in an emergency. You need to specialize your kit to your circumstances. Here's what's in mine:

In Mine/3 yr old's:
Water filter
Water purification tabs
Bottled water

Firestarting goods--matches, lighter, dryer lint firestarters, sappy sticks, magnesium firestarter thingy
Shake flashlight, solar/crank radio
Lightsticks

Razor blades, small wire, rope, fishing line/hooks, sewing kit, empty gallon ziplocks

Change of clothes and thermals for each of us
A pair of old but still good hiking boots tied to the outside
Vacuum packed fleece baby blanket (if you were a kid would you honestly feel comforted wrapped in a crackly emergency blanket?)

Poncho, emergency blanket, compass, whistle

Pencil, paper, deck of cards

First Aid, sanitary wipes, purell

Sunblock, insect repellent
Hand warmers
Leather gloves

Toiletries--soap, contact solution and case (I wear them), backup glasses, toothbrush/paste, etc.
--A note here, my dad used to fly overseas and the airline would give him travel size stuff--works great for these packs.
Toilet paper
Also feminine hygeine since I know what time of the month it will be if disaster strikes ;) You men won't need to pack those--although it's not a bad idea to add some to your first aid, they're real good at stopping heavy bleeding!

Gerber tool

Power bars, MRE's, Mountain House meals, survival food bars (probably too many, but I know I have a real low tolerance for missing meals and still being worth anything especially when doing any physical exertion. And I'm also packing extra for the young'uns that can only pack so heavy a pack of their own.

M&M's--there's no survival without chocolate

Important documents on a thumb drive

Mini scriptures

Cash (small bills/change)

That about covers my pack, dad has the stove in his, so hopefully we'll be together :)

It is all packed in an internal frame standard hiking backpack. Nothing fancy, but enough support that it wouldn't make for needing back surgery if I had to pack it somewhere.

When my kids were babies I had formula, bottles, baby cereal, bowls, baby spoon, and diapers in there.


My 7 yr old's pack (9 yr old's is similar):

Change of clothes plus thermals
Small stuffed animal

Poncho, emerg. blanket, small rope, matches, candle, fire starter sticks

Flashlight, lightsticks, whistle

Pencil, paper, scissors, flagging tape

1 MRE, tuna and crackers, 5 power bar/clif bars, candy
Bottled water

I put all theirs in those backpacks with wheels to make it easier for them to pack them.


Now, I don't know if my pack is overkill, but I am the mom and were it just me I may be able to cut it down a bit, but it's not. Plus the more I research the more I find there's things I don't have in there that I could see being very useful.

I hope to never have to pack it all out somewhere--if I had to haul all that stuff plus the three little ones we wouldn't get too far. I need a handcart! I hope to be able to stay in my home, then I'll have the rest of my resources to pull from also.

The kids all have red clothes and the flagging tape--I want to be able to find them--not sure if this is the best if others are looking for us, but I'm thinking standard natural disaster and trying to find my kids in our town/area if they are separated from mom and dad.

I use my foodsaver vacuum packer to pack all the clothes, blankets, diapers, etc so there's more room in the pack and they'll stay dry until they are needed. That's why my kids' packs have scissors in them--so they can get to their clothes.

And the packs all have a name tag on them with name, parents names, address, allergy information, etc. It's also a good idea to have a family picture in each pack so in case one of you is missing the others can show people who to look for--I need to update our picture and print one for each pack.